Categories
modular blank plate manufacturer

How to Install a Modular Surface Box at Home (Step-by-Step Guide)

If you have ever stared at an unfinished switchboard with open slots and wondered what goes there, the answer is simple: a modular blank plate. These small but important fittings cover unused cutouts in your electrical panel, keeping the board neat, safe, and dust-free. Whether you are doing a fresh installation or upgrading an old panel, this guide walks you through every step clearly.

No electrician jargon. No confusing diagrams. Just a practical, straightforward process you can follow at home with basic tools.

What Is a Modular Surface Box and Why Does It Matter?

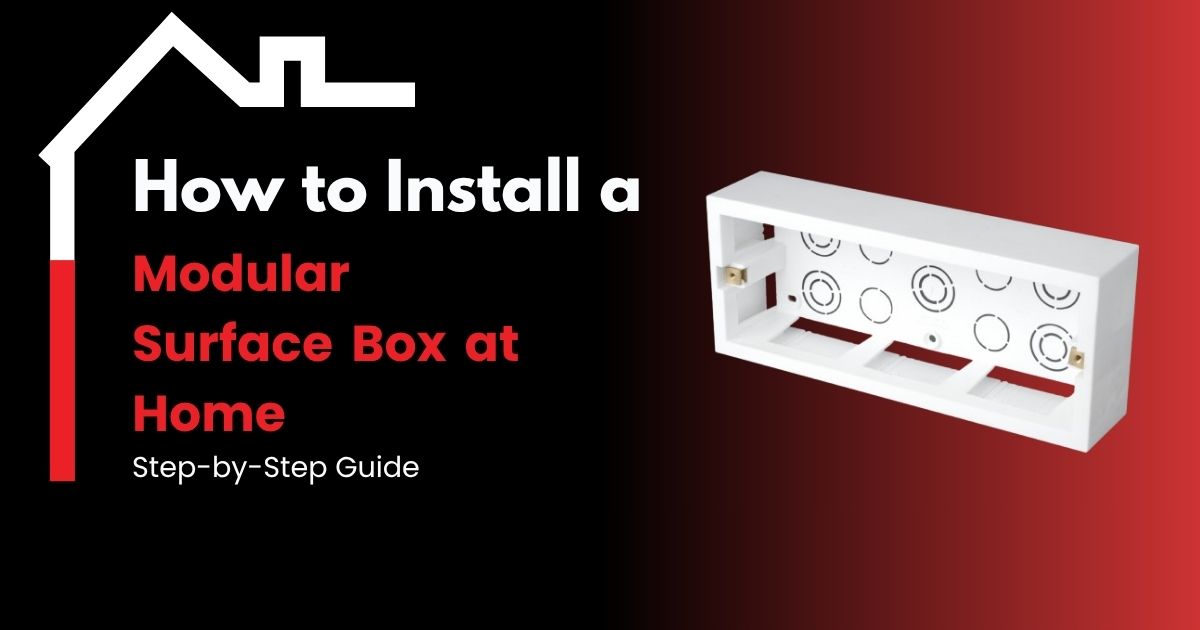
A modular surface box is the outer enclosure mounted on your wall that holds switches, sockets, and other electrical fittings. It comes with multiple slots or positions, and not every slot is always used. That is where an electrical blank plate steps in.

An electrical blank plate is a flush cover used to seal off any empty module space inside a switchboard. Without it, you leave open gaps that expose internal wiring, invite dust, and create a shock risk for anyone touching the panel. In homes with children, this is especially important.

These blank plates are available in different module sizes to match standard switchboards. A Blank Plate 1M fits a single module position, while larger sizes cover multiple slots. Depending on your switchboard brand and layout, you may need a blank plate, single penta modular, or a multi-module variant.

Tools and Materials You Will Need

Before you begin, gather everything in one place. This saves you from running back and forth mid-installation.

Tools:

  • Flathead screwdriver
  • Phillips screwdriver
  • Voltage tester or non-contact tester
  • Measuring tape
  • Pencil for marking

Materials:

  • Modular surface box (if not already installed)
  • Electrical blank plates in the right module size
  • Mounting screws (usually included with the plate)
  • Wall anchors or rawl plugs (for surface mounting)
  • Cable clips or ties (optional, for tidy wiring)

If you are sourcing materials locally, there are reliable modular plate manufacturers in India who supply consistent-quality plates in bulk and retail. For those based in Gujarat, you can also find quality modular plates in Ahmedabad at electrical hardware stores and directly from manufacturers.

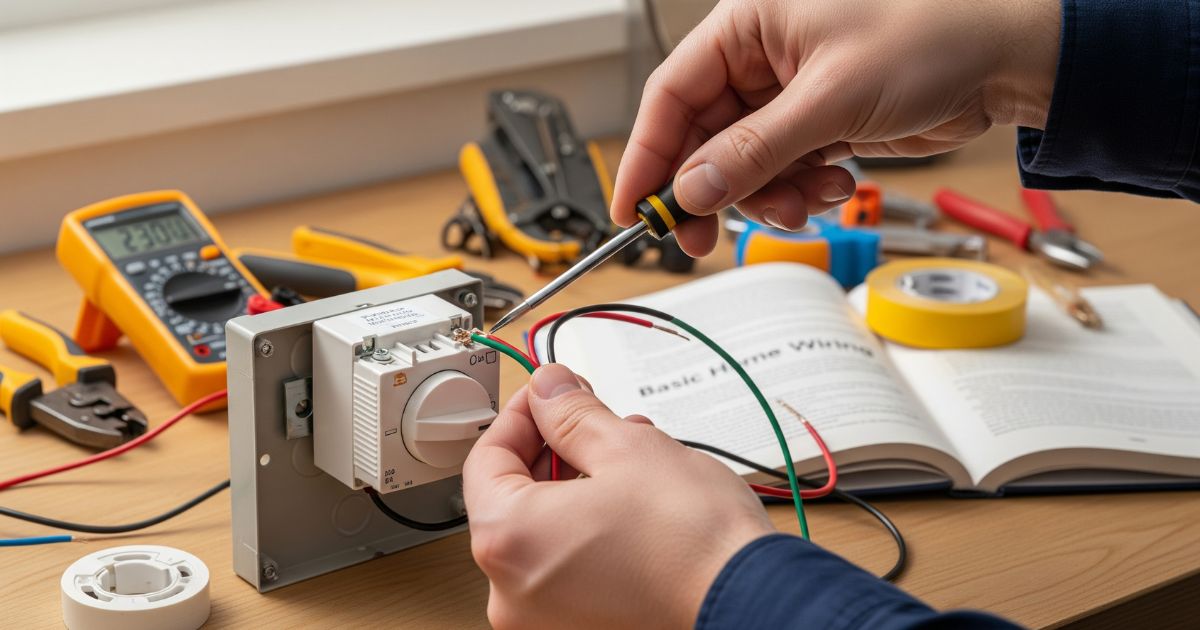
Step 1: Turn Off the Power Supply

This is non-negotiable. Before touching any part of your switchboard or wiring, go to your main distribution board and switch off the MCB (Miniature Circuit Breaker) for the relevant circuit. If you are unsure which one controls the area you are working on, switch off the main supply entirely.

Use a voltage tester to confirm zero current at the socket or switch points nearby. Do not rely on visual checks alone.

Safety first, always.

Step 2: Remove the Existing Switchboard Cover

Most modular switchboards have a front frame that clips or screws onto the surface box. Use a flathead screwdriver to gently pry open the clips or unscrew the retaining screws. Set the cover aside carefully.

You will now see the internal layout: mounted switches, sockets, and any open module slots waiting to be filled. Take a moment to count how many blank positions you need to cover. This helps you confirm you have the right number of plates before you proceed.

Step 3: Choose the Right Blank Plate Size

Blank plates are sized by module count. A single-module blank covers one slot, while double or larger options cover more. Match your plate size to the open slot in your board.

For Roma-type switchboards, purpose-made options are available. The 4×5 Modular Blank Plate for Roma-Type Switchboards is a popular choice for panels with a 4×5 grid layout. Similarly, the BLANK G10 Modular Plate for Roma-Type Panels and the BLANK G9 Modular Plate for Roma-Type Panels are designed to fit snugly without gaps or misalignment.

For standard single-module slots, the Eleys 1M Modular Blank Plate | Roma-Type Cover offers a precise fit with a clean finish.

If you need a plate that can be painted to match your wall or interior color scheme, opt for a single blank plate paintable variant. These are available from most electrical fittings suppliers.

Step 4: Snap or Screw the Blank Plate Into Position

Most modular blank plates follow a simple snap-fit mechanism. Align the plate with the open module slot, press firmly from the front, and it clips into the frame. You should hear or feel a click when it seats correctly.

Some plates use small screws instead of clips. If yours does, align the plate, insert the screws into the designated holes, and tighten gently. Do not over-tighten, as this can crack the plate or distort the frame.

For a Blank Plate 1M (single module), the fit process takes under a minute once you have the right size in hand.

Step 5: Reattach the Switchboard Cover

Once all open slots are filled, place the front cover back onto the surface box. Align the clips or screw holes, then press or fasten them back into place. Check that the cover sits flush and there are no gaps around the edges.

If your board has a transparent or translucent panel, make sure the blank plates are visible and correctly positioned before closing it up.

Step 6: Restore Power and Test

Go back to your distribution board and switch the MCB back on. Return to the panel you worked on and check the surrounding switches and sockets to ensure everything works normally. The blank plates themselves carry no current, so there is nothing to test on them directly.

Run a quick check on all the switches, sockets, and any fan regulator or USB socket nearby. If you have a smart home panel or multi-use modular board, verify that each active slot responds correctly.

If you are building out a full home electrical system and need quality electrical accessories beyond blank plates, you might also want to check what’s available from USB socket manufacturers for charging-point integration.

Common Mistakes to Avoid

Using the wrong module size: A plate that is too small leaves a visible gap. One that is too large will not fit. Always measure the slot before purchasing.

Skipping power cutoff: Even experienced DIYers make this mistake when they are in a hurry. A live board is a serious hazard.

Forcing a plate into the wrong slot type: Roma, Legrand, Anchor, and other brands have their own modular systems. A plate made for one system may not align with another.

Over-tightening screws: This is a common error with screw-fit plates. Tighten just enough to hold the plate firm.

Ignoring aesthetics: A mismatched or discolored plate on a freshly painted wall stands out badly. Choose a plate that blends with your board color, or use a paintable variant.

What to Look for in a Quality Blank Plate

Not all blank plates are made the same. The material, thickness, and surface finish all affect how long the plate lasts and how it looks in your home.

Material: High-quality plates use ABS plastic or polycarbonate that resists heat, impact, and UV discoloration over time. Cheaper variants may yellow or warp within a year or two.

Surface finish: A smooth matte or gloss finish gives the panel a uniform, premium look. Rough or uneven surfaces collect dust and look cheap even when new.

Paintable surface: If your home uses custom wall colors or you prefer a seamless look, a paintable blank plate lets you coat it to match. This is a popular choice in renovation projects.

Dimensional accuracy: The plate must align perfectly with the module grid. Even a millimeter of misalignment creates visible gaps.

When sourcing in Gujarat, a reliable blank plate manufacturer in Ahmedabad can supply consistent batches with tight tolerances, which matters if you are fitting out multiple rooms or a large property.

How Modular Blank Plates Fit Into the Bigger Picture

Modular electrical systems are designed for flexibility. You can start with a basic switchboard layout and expand or modify it over time. Blank plates hold the unused positions today, and tomorrow, you simply swap them out for a new switch, socket, or dimmer as your needs change.

This is why quality matters even for something as simple as a blank plate. A low-quality plate may leave residue on the frame or crack when removed, making future upgrades harder.

If you are interested in how analog and digital components interact within modular electrical systems, this overview of analog vs. digital components is a useful read.

For homes where energy efficiency is a priority, understanding how fan regulators affect your electricity bill can help you make better choices. Do fan regulators affect electricity bills? covers this in detail.

Modular Blank Plates for Commercial and Industrial Use

While this guide focuses on home installation, blank plates are just as important in commercial spaces, offices, hotels, and factories. In high-traffic areas, the plates take more wear and need to be made from tougher materials.

For industrial-grade modular fittings, products made from engineering-grade plastics offer better resistance to impact, chemicals, and temperature changes. The Electro Plastic Products Manufacturer range covers a wide spectrum of such fittings designed for demanding environments.

For specific sheeting applications in modular electrical enclosures, Polypropylene Fan Sheet Manufacturer products offer a durable base material used in both consumer and industrial settings.

Why Sai Electronics India Is a Trusted Name for Modular Fittings

Sai Electronics India has been manufacturing electrical fittings that meet the demands of both residential and commercial customers across India. Their range of blank wall plates, switch covers, and modular accessories is built with dimensional accuracy and material consistency that installers and contractors rely on.

Whether you need a single-piece blank plate1M for a home touch-up or a bulk order of switch blank plate manufacturer-quality products for a large project, their catalog covers the full range.

Their products are widely used by electricians and contractors looking for modular switch plate manufacturer quality at practical pricing. From standard sizes to custom module configurations, the range addresses real-world installation needs.

If you are planning a home renovation and thinking about ceiling fans, the guide on how ceiling fan regulators work and why quality matters from their blog is worth reading alongside your electrical planning.

For those comparing top Indian brands for home electrical systems, the post on Made in India fan regulator manufacturers for modern homes gives a useful breakdown of the domestic market.

Frequently Asked Questions

Can I install a modular blank plate without an electrician? Yes. Blank plates carry no live current and involve no wiring. As long as you switch off the power supply first, installing or replacing a blank plate is a safe DIY task.

What is the standard size for a blank plate in India? The most common size is 1 module (1M), which fits a single slot in a standard modular switchboard. Larger sizes like 2M, 3M, and multi-gang options are also available, depending on the board layout.

Are paintable blank plates safe to use? Yes. Paintable blank plates are made from materials safe for coating. Use a standard wall paint or acrylic paint and allow it to dry fully before fitting the plate back.

How do I know if a blank plate fits my switchboard? Check your switchboard brand and module grid. Most Indian switchboards follow Roma-type or similar modular systems. Match the plate size and system type before purchasing.

Where can I buy quality blank plates in Ahmedabad? You can source them from electrical hardware stores or directly from manufacturers. For a reliable modular blank plate manufacturer with a broad product range, visit Sai Electronics India.

Final Thoughts

Installing a modular surface box or fitting blank plates into an existing switchboard is one of those small tasks that makes a big difference to how your home looks and feels. A neat, fully covered panel signals a well-maintained space, and the process itself is genuinely straightforward.

Take your time with the power cutoff, choose the right plate size for your board type, and use quality materials that will last. If you are ever unsure about the right product for your specific panel, feel free to contact us and get guidance directly from a team that works with these products every day.

For broader home electrical planning, including fan regulators and modular accessories, the fan regulator manufacturers in India page is a good starting point.

Categories
Fan Regulator Manufacturing

How to Connect a Fan Regulator Step-by-Step: A Simple Wiring Guide

A fan regulator is a small yet essential device that controls the speed of your ceiling fan. Whether you’re setting up a new fan or replacing an old regulator, understanding how to connect a fan regulator correctly ensures safe operation and optimal performance. Many homeowners hesitate to handle electrical work themselves, but with the right guidance and safety measures, installing a fan regulator can be straightforward.

When choosing a regulator, it’s important to source it from reliable fan regulator manufacturers or a trusted fan regulator company to ensure quality and durability. This guide will walk you through the entire process of connecting a fan regulator, from choosing the right type to testing your installation. By following these steps carefully, you’ll gain confidence in handling basic electrical work while ensuring your fan operates smoothly and safely.

Types of Fan Regulator Switches

Before starting the installation, it’s important to understand the different fan regulator switch type options available in the market. Each type has distinct features and wiring requirements.

Rotary or Step-Type Regulators

These traditional regulators use a rotating knob to adjust fan speed. They typically offer 4-5 speed settings and work by adding resistance to the circuit. While they’re affordable and widely available, they can generate heat during operation and may wear out faster than modern alternatives.

Electronic Regulators

Electronic fan regulators use semiconductor technology to control fan speed more efficiently. They produce less heat, offer smoother speed transitions, and consume less power. Products like the 1 M 7 Diamond Modular Ceiling Fan Regulator use advanced circuitry that extends fan life and reduces energy waste.

Modular Touch Regulators

Modern modular regulators feature touch-sensitive panels or buttons instead of rotating knobs. They provide precise speed control and add a contemporary aesthetic to your walls. The 1 M 7 Dio Modular Regulator offers sleek designs that complement modern interiors while delivering reliable performance.

Smart Digital Regulators

The most advanced option, smart regulators can be controlled remotely via smartphone apps or voice assistants. They often include features like timer settings, energy monitoring, and integration with home automation systems.

Understanding your fan regulator switch type helps you identify the correct terminals and wiring configuration during installation.

Tools and Materials Needed

Gathering the right tools before starting makes the installation process smoother and safer. Here’s what you’ll need:

Basic Tools:

  • Flathead and Phillips screwdimmers
  • Wire stripper or cutter
  • Voltage tester or multimeter
  • Pliers (needle-nose preferred)
  • Electrical tape
  • Small torch or flashlight

Safety Equipment:

  • Insulated gloves
  • Safety glasses
  • Non-conductive ladder or step stool
  • Insulated screwdrivers

Materials:

  • New fan regulator (appropriate for your fan wattage)
  • Wire connectors or terminals (if not included)
  • Mounting screws (usually provided with the regulator)
  • Modular box (if upgrading to modular type)

Having everything ready before you begin prevents unnecessary trips and keeps you focused on the task.

Safety Precautions Before Starting

Electrical work requires strict adherence to safety protocols. Never skip these critical steps:

Turn Off Main Power Supply

Locate your home’s circuit breaker panel and switch off the breaker controlling the fan circuit. Simply turning off the wall switch isn’t sufficient as someone might accidentally turn it back on while you’re working.

Verify Power is Off

Use a voltage tester to confirm that no electricity is flowing to the wires. Test both the existing regulator terminals and the wire connections. This simple check can prevent serious electrical shock.

Inform Household Members

Let everyone in your home know that you’re working on electrical installations. Consider placing a note on the breaker panel to prevent anyone from turning the power back on.

Work in Proper Lighting

Ensure adequate lighting in your work area. If the room is dark, use a battery-powered flashlight rather than relying on room lights that may be on the same circuit.

Check Regulator Compatibility

Verify that your new regulator matches your fan’s wattage rating. Installing an undersized regulator can cause overheating and potential fire hazards.

Step-by-Step Guide to Connect a Fan Regulator

Now that you’ve prepared properly, follow these detailed steps to install your fan regulator safely.

Step 1: Turn Off Power and Remove the Old Regulator

After switching off the circuit breaker, remove the faceplate of your existing regulator by unscrewing it. Most regulators have two screws holding the plate in place. Set aside the screws carefully as you may need them for the new installation.

Gently pull the old regulator forward to expose the wiring behind it. Take a photo of the existing connections with your phone before disconnecting anything. This visual reference can be helpful if you need to troubleshoot later.

Step 2: Identify Wiring Connections

Indian electrical systems typically use three types of wires:

  • Live Wire (Phase): Usually red or brown, this carries current from the power source
  • Neutral Wire: Typically black or blue, this completes the circuit
  • Earth Wire: Green or green-yellow striped, providing safety grounding

Fan regulator wiring involves four connection points:

  1. Incoming live wire from the switchboard
  2. Outgoing live wire to the fan
  3. Neutral wire (common connection)
  4. Earth wire (safety ground)

Use your voltage tester one final time to confirm all wires are de-energized before touching them.

Step 3: Connect the Live Wire to the Regulator

The regulator controls fan speed by regulating the current flowing through the live wire. Identify the terminal marked “Input” or “L-In” on your new regulator. Connect the incoming live wire (from your switchboard) to this terminal.

Next, locate the terminal marked “Output,” “Load,” or “L-Out.” Connect the wire going to your fan to this terminal. These connections allow the regulator to control the current flowing to your fan motor.

If you’re installing modular products like the 1 M 7 SILVER, the terminals will be clearly labeled on the back. Loosen the terminal screws, insert the stripped wire ends (about 8-10mm of exposed wire), and tighten securely without over-torquing.

Step 4: Connect Neutral and Earth Wires

The neutral wire typically bypasses the regulator and connects directly in the electrical box using wire connectors. Join all neutral wires together: the incoming neutral, the outgoing neutral to the fan, and the regulator’s neutral connection (if applicable).

Similarly, connect all earth wires together. Even though the earth doesn’t carry current during normal operation, it provides crucial protection against electrical faults.

Wrap all wire connections with electrical tape for added insulation and security.

Step 5: Secure the Regulator and Switch Plate

Carefully push the connected regulator back into the mounting box. Ensure no wires are pinched or stressed. The regulator should fit snugly without forcing.

Align the regulator properly so that the control knob or switch faces the correct direction. Use the provided screws to secure the regulator to the box. Don’t overtighten as this can crack plastic components.

Attach the faceplate or modular frame. For modular regulators like the 1 M CROMA BLACK Modular Regulator, snap the frame into place and ensure it sits flush against the wall.

Step 6: Turn On Power and Test

Return to your breaker panel and switch the circuit back on. Test the regulator at different speed settings to ensure it’s working correctly. The fan should respond smoothly to speed adjustments without unusual noises or flickering.

If everything works properly, your installation is complete. If you notice any issues, turn off the power immediately and recheck your connections.

Common Mistakes to Avoid

Even experienced DIYers can make errors during installation. Watch out for these common pitfalls:

Reversing Input and Output Connections

Connecting wires to wrong terminals is the most frequent mistake. Always double-check that the incoming live wire connects to the input terminal and the fan wire connects to the output.

Inadequate Wire Stripping

Stripping too much insulation exposes excess bare wire that could cause short circuits. Strip only 8-10mm of insulation. Conversely, stripping too little prevents proper contact with terminals.

Ignoring Wire Capacity

Using wires that are too thin for your fan’s current rating creates fire hazards. Standard ceiling fans typically require 1.5 sq mm wires for safe operation.

Overtightening Terminal Screws

Excessive force can damage the regulator’s internal components or break wire strands. Tighten screws firmly but gently until the wire is secure.

Mixing Regulator Types

Don’t install an electronic regulator designed for induction motors with a brushless DC fan or vice versa. Always match the regulator type to your fan’s motor technology.

Troubleshooting Tips

If your fan doesn’t work correctly after installation, try these diagnostic steps:

Regulator Not Working at All

First, verify that power is reaching the circuit by checking the breaker. Test the voltage at the regulator’s input terminal. If voltage is present but the fan won’t run, check for loose connections or a faulty regulator.

Fan Speed Not Changing

If the fan runs at only one speed regardless of regulator setting, you may have bypassed the regulator accidentally by connecting the fan wire directly to the incoming live. Review your connections against the wiring diagram.

Flickering or Buzzing Sounds

These symptoms often indicate loose connections or incompatibility between the regulator and fan type. Tighten all terminals and verify that your regulator suits your fan’s technology. Older step-type regulators commonly produce humming sounds, which is normal.

Regulator Overheating

If the regulator becomes excessively hot during operation, it may be undersized for your fan’s wattage. Replace it with a higher-capacity model suitable for your fan.

Intermittent Operation

Check for damaged wires or corroded terminals in the connection box. Clean or replace as necessary.

Choosing Quality Products for Reliable Performance

The quality of your fan regulator significantly impacts both safety and longevity. At Sai Electronics India, we manufacture a wide range of fan regulators designed for Indian electrical systems and climate conditions.

Our modular series combines aesthetic appeal with robust functionality. Whether you need a basic rotary regulator or an advanced touch-based control, you’ll find suitable options in our Shop.

Before making a purchase, consider factors like your fan’s power rating, room aesthetics, and desired features. 

For comprehensive guidance on choosing between different technologies, check out our article on choosing analog, digital, and smart fan regulators. Understanding these differences helps you make informed decisions that balance functionality, energy efficiency, and budget.

Conclusion

Learning how to connect fan regulator properly empowers you to handle basic electrical maintenance confidently. By following the steps outlined in this guide, using appropriate tools, and prioritizing safety, you can successfully install a fan regulator in your home.

Remember that the key to successful installation lies in careful preparation, accurate wire identification, and thorough testing. Don’t rush through any step, and never compromise on safety protocols.

If you feel uncertain about any part of the process, consulting a licensed electrician is always the wise choice. Electrical work requires respect and caution, regardless of how simple it may seem.

For more insights on fan regulators and modern electrical solutions, visit our article on how to choose the best fan regulator for your lifestyle.

Ready to upgrade your fan control system? 

Visit Sai Electronics India to find premium quality regulators designed for safety, efficiency, and style. Our expert team can help you choose the perfect regulator for your needs.

Chat With Us